The upside of this step is that it made my email and thus other online accounts more secure. The down side is that everything that interfaced with Gmail broke.
The most annoying thing was that I was no longer able to send emails from applications in my iPhone (like the camera and craigslist apps). I ineffectually whined about that for a week or so and then tried for another week to get Jon to just fix it for me. Finally, I caved and fixed it myself.
It wasn't as painful as I expected. Here are the steps in case this has happened to you and your significant other/business partner has refused to fix it for you:
1. Go to https://accounts.google.com/b/0/IssuedAuthSubTokens#accesscodes and login using your normal Gmail username and password.
2. Scroll down to the section that says Application Specific Passwords.
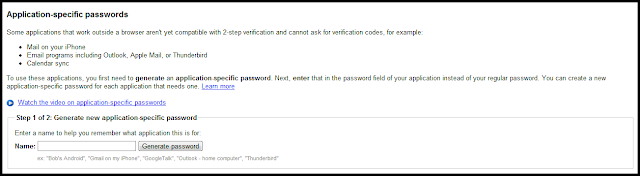
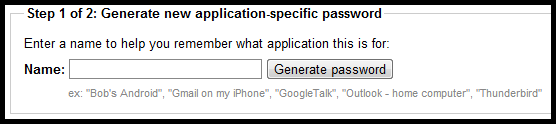
3. Type in some text explaining what application you are getting a password for (e.g. iPhoneGmail) and click Generate Password.
4. Keep that window open while you go to your iPhone and navigate to Settings -> Mail, Contacts, Calendars -> Gmail
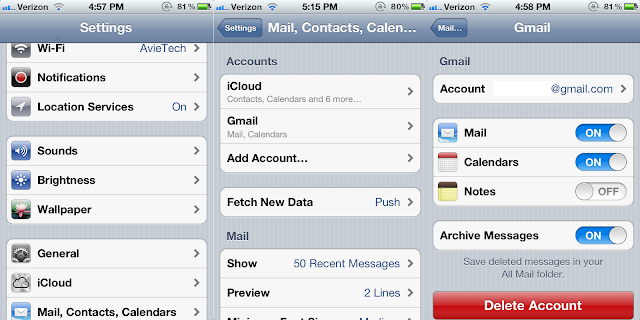
5. Click on your email address next to Account.
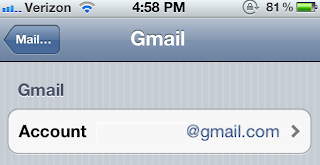
6. Click on your current password, delete it and enter the application specific password that you generated in step 3.
.PNG)
7. Optional: test it that it worked. I tested it by sending myself a photo from my camera.
And that's it! You are now a rockstar who didn't let the annoyance factor of two step verification stop you from making your data more secure. Congratulations!
No comments:
Post a Comment